User Roles
Overview of User Roles
The User Roles screen allows an authorized user to define and maintain the various user login roles and the actions they can perform within the system. In this area, new security roles can be created by first copying from an existing role and then restricting / allowing the actions that users assigned to the new role can perform.
A User Roles security group establishes the basic navigation structure that the individual will see in the system after logging in.
All user roles derived from the same security group will see the same navigation menus. Please refer to the Security Groups guide for more information.
In addition to the navigation structure, a user's security group establishes the options displayed in the action dropdown on the Bond screen.
Adding a User Role
Select System Tables/Authority Levels/User Roles.
The system displays a listing of all user roles, including the Name, Security Group, and Description.
Select the Copy Role link to add a new user role to the system.
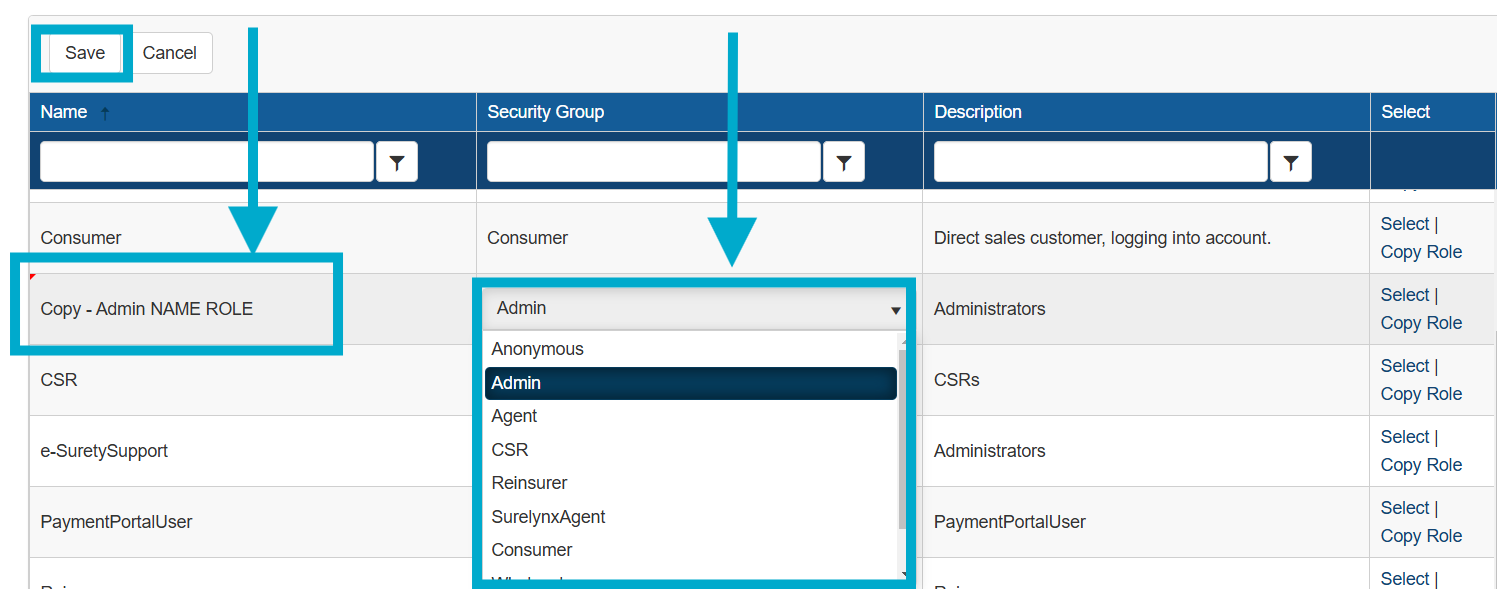
A row named Copy (User Role copied) will appear.
Name the new user role.
This role name appears in a dropdown on the Users screen when creating or editing a user
Assign a Security Group
Use the Security Group dropdown menu to select a group.
The group limits the user to certain areas of the platform. Please refer to the Security Groups for more information.
Enter a description of the user role with any pertinent details.
Select the Save button.
The Cancel button will reverse all changes made since navigating to User Roles or since the last save (whichever was done last) if selected.


Editing a User Role
Edit an existing user role by clicking in the fields for the user role to be changed.
Make edits and select the Save button.
The Cancel button will reverse all changes made since navigating to User Roles or since the last save (whichever was done last) if selected.
Modifying the Secured Actions for a User Role
Click the Select link to modify the secured actions for a new or existing user role.
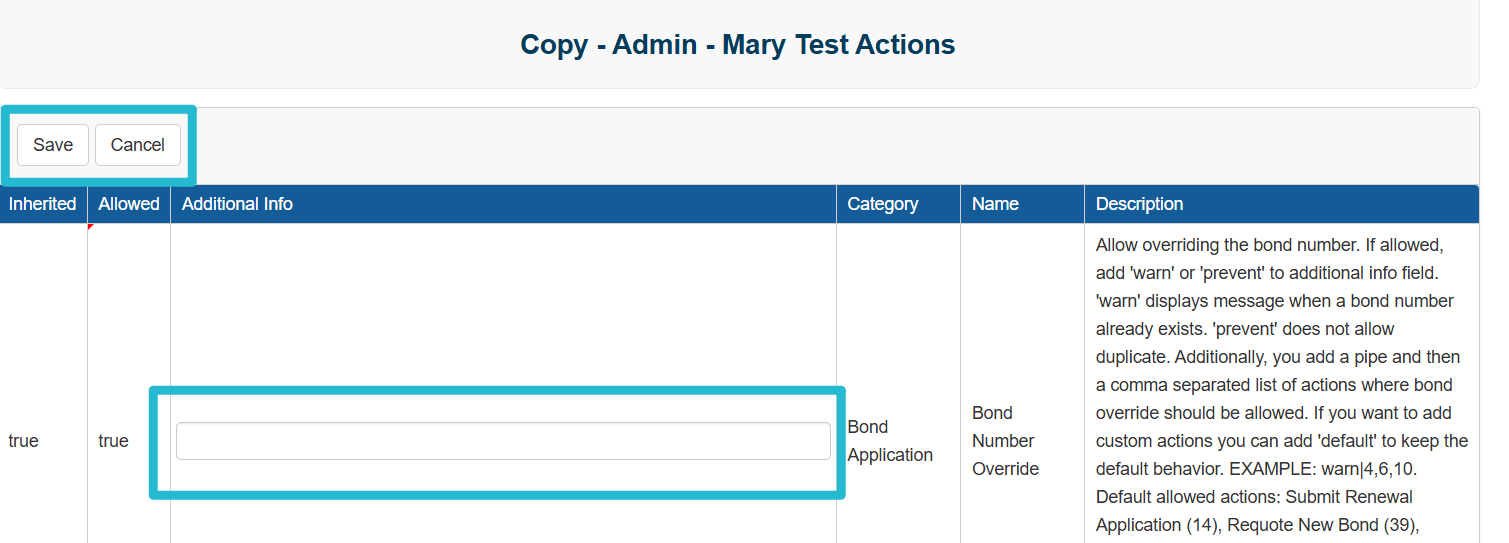
The system will display a listing of all user role secured actions
Inherited
The value from the user role from which this user role was copied.
Allowed
The value designating if this user role is or is not allowed to perform this secured action.
Additional Info
Area to insert additional settings to modify how the secured action functions (not used for all secured actions).
Category
The area of the system which this secured actions makes changes.
Name
The basic name of the action.
Description
A brief description of the secured action and any instructions pertaining to the secured actions Additional Info inserts.
Click in the Allowed column for the secured action and check or uncheck the box to add or remove a secured action from a user role.
Certain secured actions have additional parameters that must be configured in the Additional Info column. If necessary for the action, click into the Additional Info field for that secured action and enter the needed data.
Select the Save button.
The Cancel button will reverse all changes made since navigating to the actions or since the last save (whichever was done last) if selected.

