Maintaining Application Rule Management for a Bond
Overview of Account Defaults for a Bond
A user can assign certain groupings of questions and rules to a bond configuration. These groupings of questions and rules are called applications. There are five types of applications: Bond, Root, Class, Category, and Account applications. Bond applications are managed directly on the Bond Configuration Maintain Bond/Manage Applications. Please refer to the Managing Bond Application Questions for more information.
Adding Question Rules to an Application
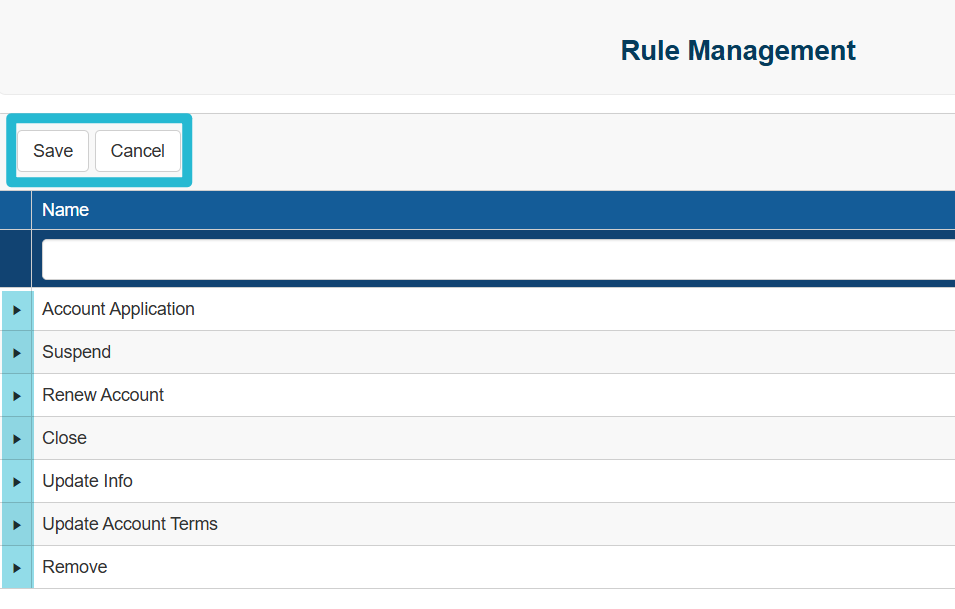
Select Maintain Applications/[Choose the Application Type]/[Choose the Application]/Rule Management. to add rules to an application.
Rules can be set for individual bond actions, such as bond application, renewal, riders, etc.

Select the triangle to the left of the bond action name to apply rules to a bond action.

For each application, rules can be set to questions asked on the same application, or for certain system criteria that is determined during the buy a bond process.
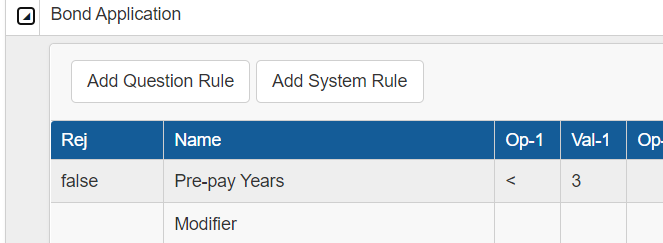
Select the Add Question Rule to add a question rule to the bond application.

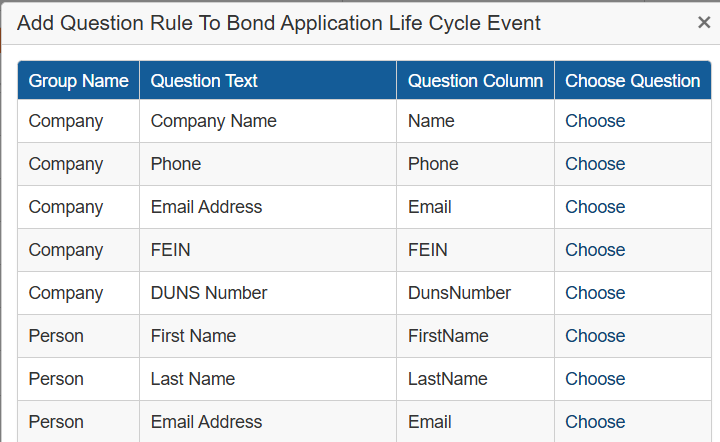
A pop-up window will appear with a list of available questions to which rules can be applied.
Select the Choose link to the right to establish a rule for the question.
The questions available are only question that are asked on this specific application.

The question will now appear in the rules list for the bond action. To have the question rule auto-approve the bond action, keep the Rej column set to false. If the question rule is an auto-rejection rule, click on the field in the ‘Rej’ column and check the box. If the value established for the question is passed, this rule will either auto-approve or auto-reject the bond action.
For the question rule to take effect, the question must have a value from the answer of the question. The answer inputted at the bond action will be evaluated against the value entered for the question rule. This value is set in the ‘Val’ columns within the row of the question rule. If the criteria for Val-1 is passed, then the system will not evaluate the values in Val-2-5. If the criteria for Val-1 fails, the system will evaluate Val-2. This progression will continue until all values are considered. Auto-rejection rules will be considered first. If an auto-rejection rule value passes, the bond action will be rejected. If no auto-rejection value passes, the decision engine will continue to evaluate auto-approval rules. If all auto-approval value columns fail, then the bond action will be referred. If an auto-approval value column passes, the bond action will be approved.
If there are no values inputted to one of the Val columns, that Val column will not be considered.

The difference between the system passing with Val-1 compared to Val-2 is that the premium rate can be modified by the ‘Modifier’ established on the last row of the rules.
This still auto-approves the bond action, but the rate will be adjusted by the modifier value.
Multiple rules can be applied to a bond action within an application.
For a Val column to pass the rule, all rules in the Val column must pass. If one fails, the system will evaluate the next column.
Adding System Rules to an Application
Select the Add System Rule button, as displayed above, to add a system rule.
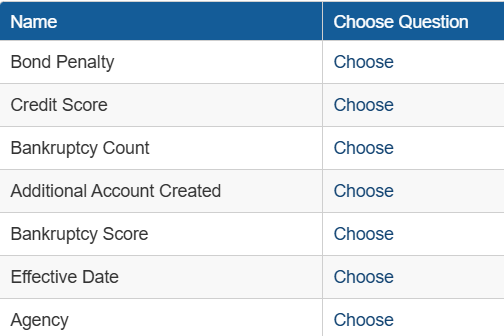
A pop-up window will appear to choose the system criteria to which the user desires to set a rule.
Select the Choose link to the right to establish select the item to establish a rule for it.

The system criteria will now appear in the rules list for the bond action.
To have the system rule auto-approve the bond action, keep the Rej column set to false. If the system rule is an auto-rejection rule, click on the field in the Rej column and check the box. If the value established for the question is passed, this rule will either auto-approve or auto-reject the bond action.
The system criteria will be generated during the bond action. The system criteria generated at the bond action will be evaluated against the value entered for the system rule. This value is set in the ‘Val’ columns within the row of the system rule. If the criteria for Val-1 is passed, then the system will not evaluate the values in Val-2-5. If the criteria for Val-1 fails, the system will evaluate Val-2. This progression will continue until all values are considered. Auto-rejection rules will be considered first. If an auto-rejection rule value passes, the bond action will be rejected. If no auto-rejection value passes, the decision engine will continue to evaluate auto-approval rules. If all auto-approval value columns fail, then the bond action will be referred. If an auto-approval value column passes, the bond action will be approved.
Ability to Refer Bonds based on number of Terms selected for Prepay.
Added functionality to set a system rule on a bond configuration regarding the number of terms chosen to prepay.

Includes ability to approve, refer or reject a bond when chosen terms exceeds, falls below, or equals a specified number of years.
If there are no values inputted to one of the Val columns, that Val column will not be considered.
The difference between the system passing with Val-1 compared to Val-2 is that the premium rate can be modified by the ‘Modifier’ established on the last row of the rules. This still auto-approves the bond action, but the rate will be adjusted by the modifier value.
Multiple rules can be applied to a bond action within an application. For a Val column to pass the rule, all rules in the Val column must pass. If one fails, the system will evaluate the next column.

Editing or Inactivating a Rule
To edit a rule for an application, enter rule management for that application.
Open the bond action to change any existing rules or to add any additional rules to the application.
Select the Inactivate link on the row to remove rules from the bond action.
When finished editing the rules to the application, make sure to save any changes before navigating away from the page by clicking on the ‘Save’ button. To remove any changes made since opening page or since the last save (whichever came later), click on the ‘Cancel’ button.
