Web Service Documentation
Overview of Web Services
Tinubu Surety Solution for Carriers (TSC) has created a new web API documentation using Postman. Navigate to the sites below to access our SOAP and REST documentation.
For REST Documentation go to: https://documenter.getpostman.com/view/4114932/RWaRNR6C
For SOAP Documentation go to: https://documenter.getpostman.com/view/4114932/RWgqVyUy
Viewing Web Service Documentation
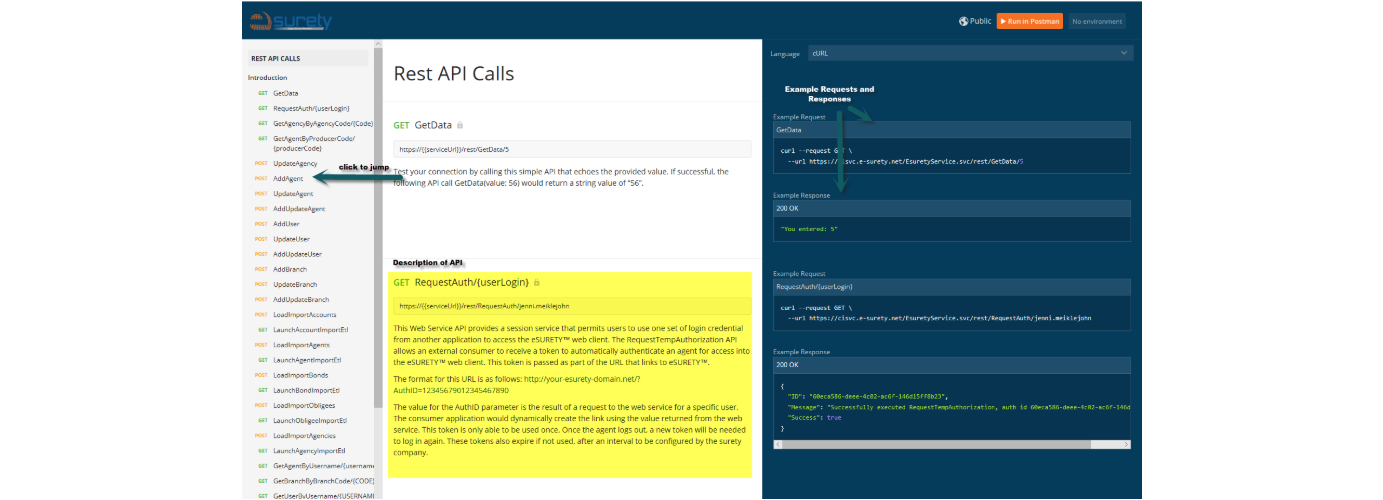
Use the left navigation pane to scroll through all the available APIs. To jump to a specific API's documentation, click on the web call in the left navigation pane. The center of the screen will include information about what the API does and the right hand side includes example Request and Response data for each API.
Testing the Web Services
Follow the steps below to test eSURETY™ web services.
Click Run In Postman located at the top right of the screen.
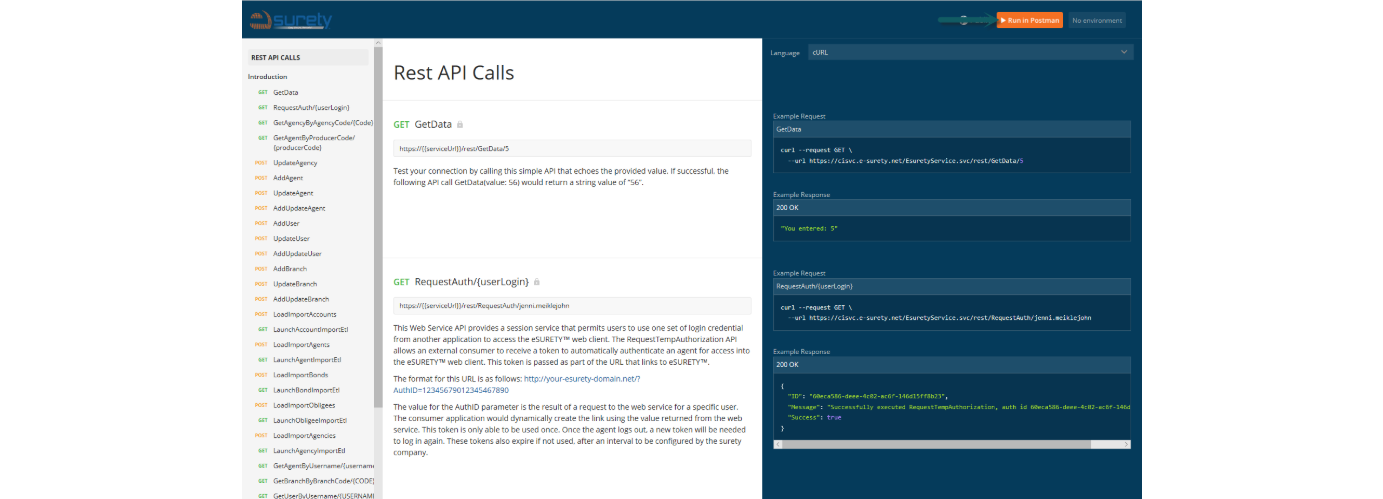
The popup pictured below will appear. If you have the Postman app installed, click Postman for Windows and proceed to step three. Otherwise, click Get the app and follow the installation instructions.

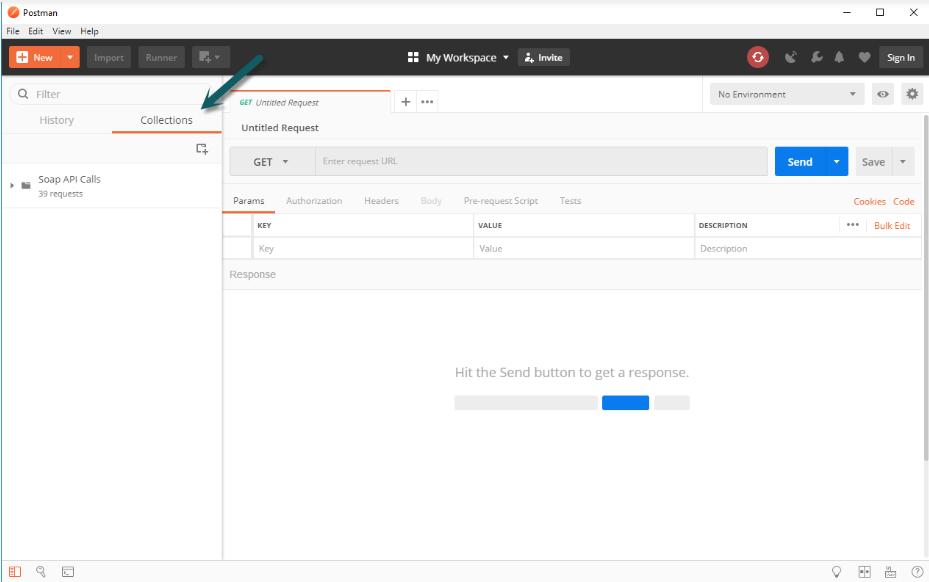
Postman will be opened and the API imported. Click Collections at the top left of the screen to view the collection.
Our Postman collect is set up to run using variables, which will need to setup prior to testing our API. In order to setup the necessary variables click the 'eye' located at the top right of the screen.
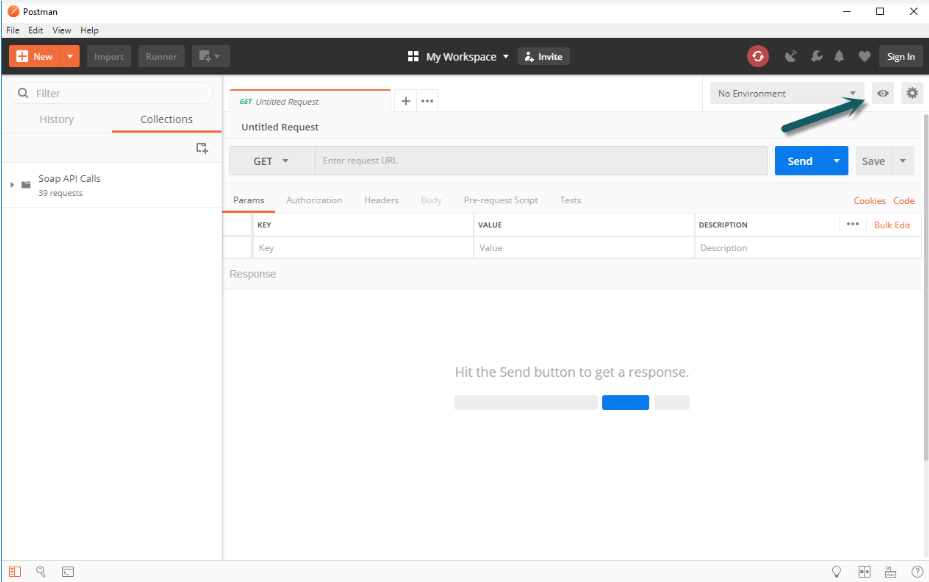
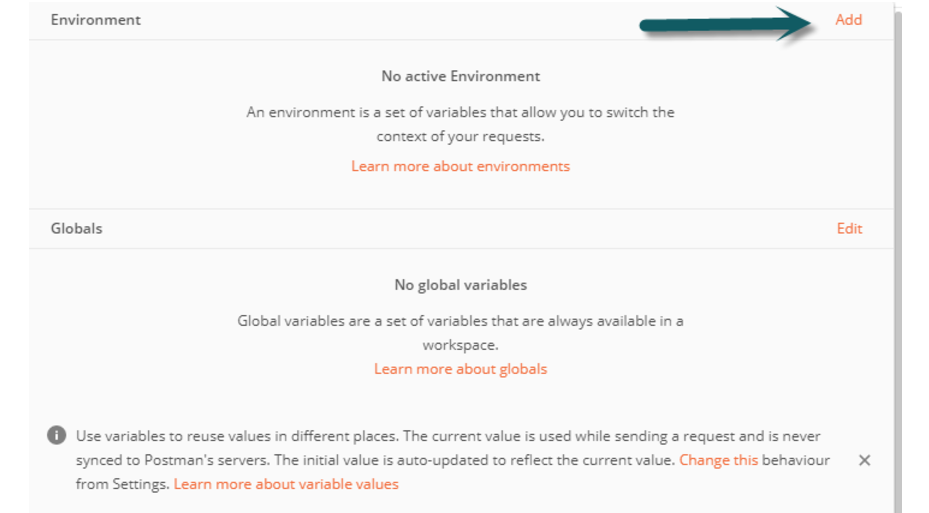
The menu pictured below will be displayed. Under the Environment option click Add.
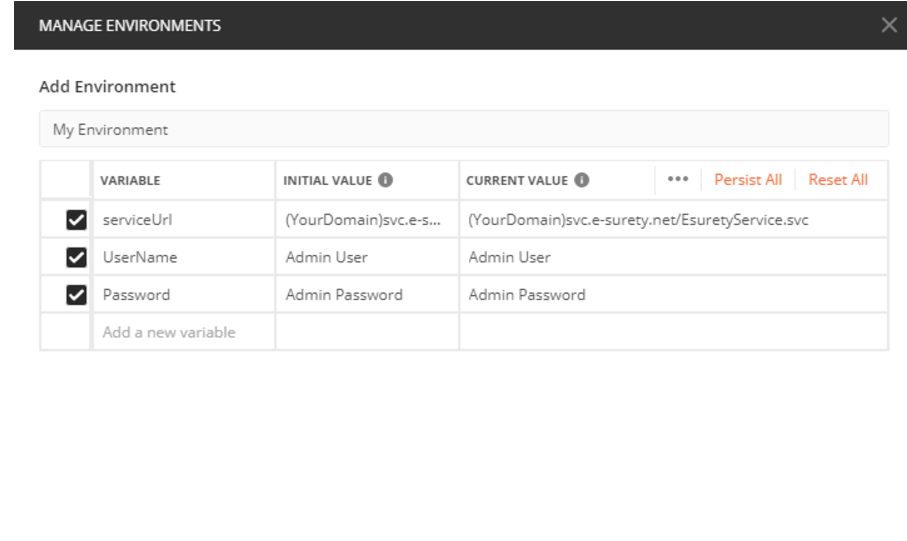
From the Manage Environments screen, add a name for your environment. Then the following three variables: serviceUrl, UserName, Password. serviceUrl is your TSC service URL, which is constructed in the following format (YourDomain)http://svc.e-surety.net/EsuretyService.svc . UserName and Password will need to be an Admin user's username and password in your TSC site that has web service privileges (By default admin users have these privileges). Once entered, click 'Add' to create the environment. You can then exit the Manage Environments popup.

Click No Environments on the top right hand side of the screen and select the environment created in step 7.
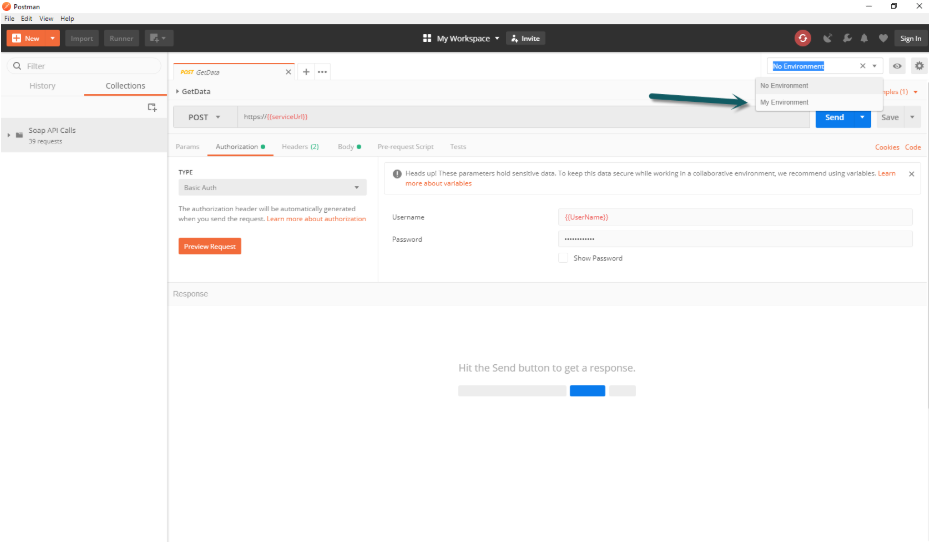
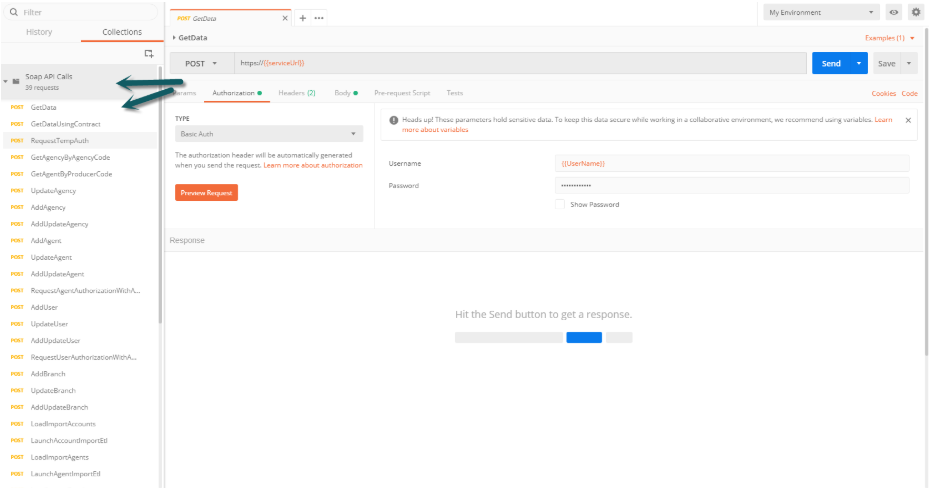
Set up is complete! In order to test, expand the Soap API Calls or Rest API Calls on the left hand side of your screen and click on the call you wish to test.
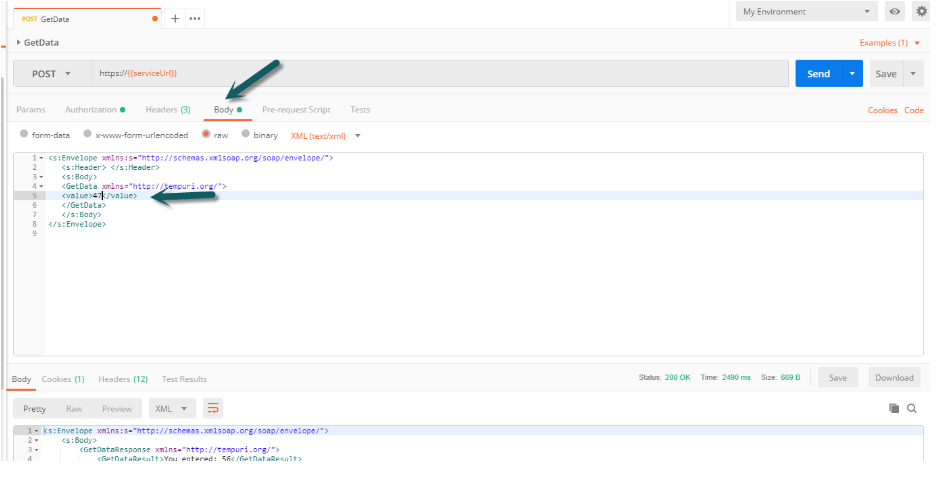
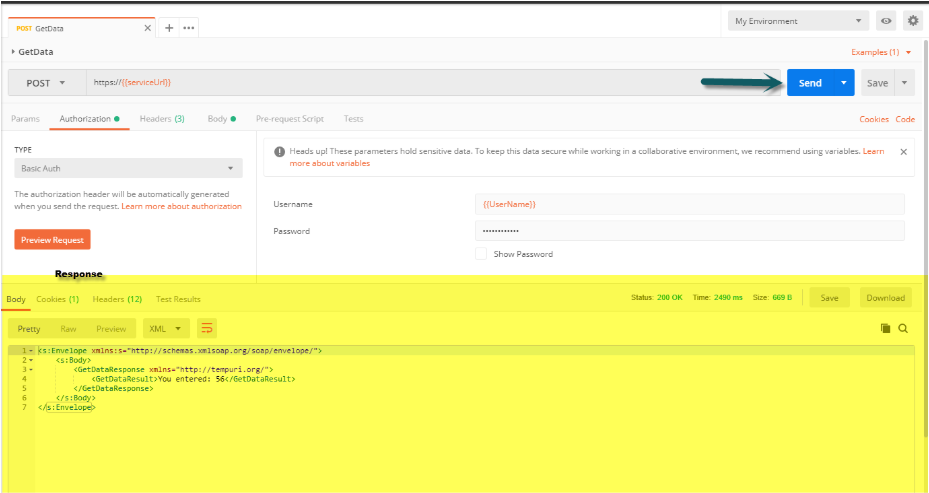
10. Click 'Send' to call the API and a response will appear in the Response area of the screen.
11. In order to change the body of the request click Body. Change the body as desired.
