Setting Up Page Messages
Overview of Messages
This feature allows the user to set up messages that appear on the screen whenever a particular decision has been made by the underwriting decision engine such as when a bond is referred due to rules in the decision engine.
These messages are system wide.
Setting up Page Messages
Select Reference Tables/Page Messages

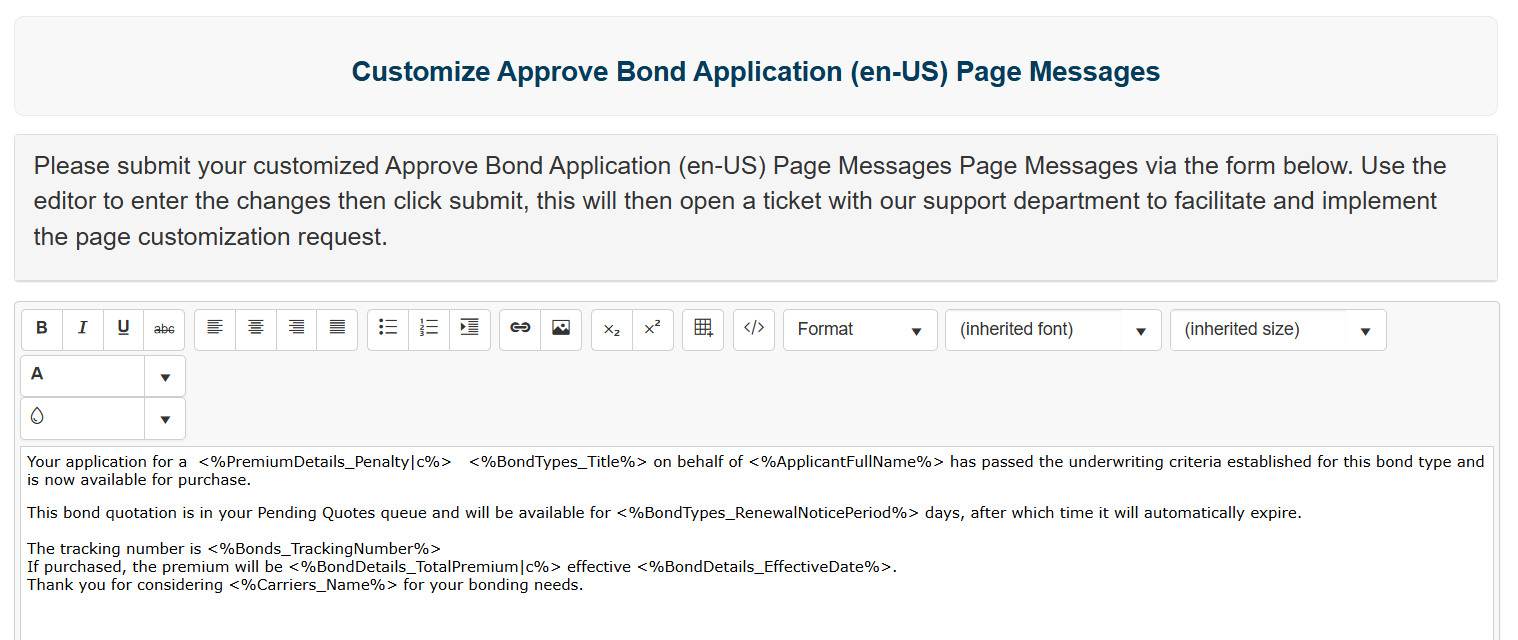
In the example below, we are working with messages that are displayed for the Bond Trigger – Referred Bond Application. There are default messages that have been setup for the basic bond actions. There are distinct page messages that can be used for Commercial bond, Commercial SureLYNX™ bonds, and Contract bonds. These can be modified to meet the needs of the user.
To access this, the Message link was selected from the Page Messages screen on the line item for the Referred Bond Application.
The message is displayed and the user can use the text editor to modify the message. The message uses overlay fields to fill in the information from the bond that is desired to be included in the message. The variable fields are similar to the Document Overlay fields.

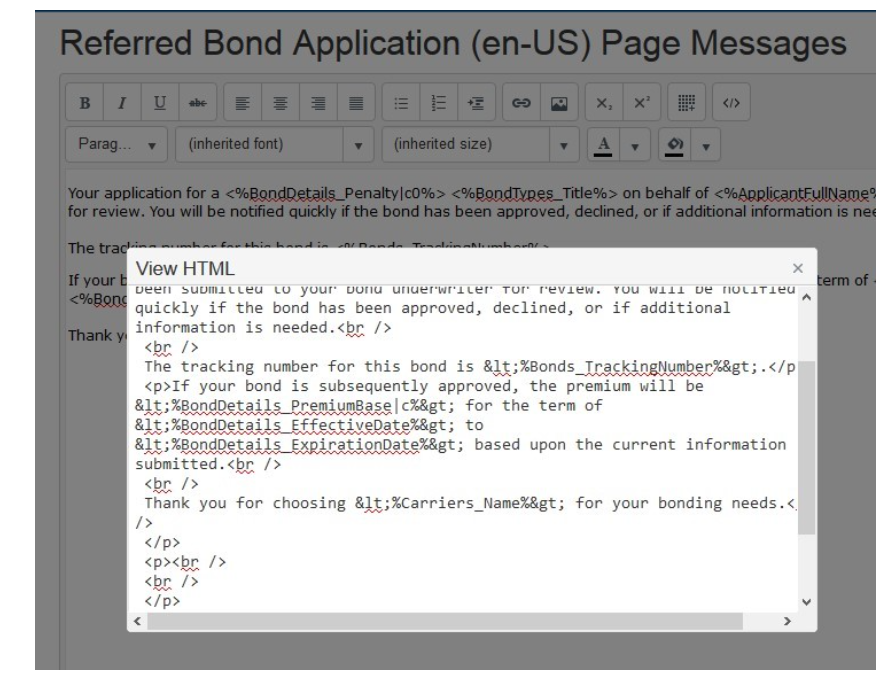
If desired, the editing can be done by using HTML. To access this, the user clicks on the 'View HTML' button on the text editing bar.
The View HTML window is displayed:

Example of the Page Message for a bond application that has been referred.
In this example, the Carriers Name in the last sentence of the message will be changed to Agency Name.
First put the cursor in the field where you would like to insert the new field name. Below that has been done after deleting the Carriers Name field.

Scroll down to the System Overlay Fields on the page and expand the Agency Overlay Category.
It is not necessary to remember exactly the format of the field name to embed in the message as the user can find it on the list of available fields.
Use the Copy button or copy the text and paste it into the message.


Formatting Fields/Messages
Additional formatting may be desired for the Page Messages for things such as money and date fields. This can be done by using the Insert with Format Button.
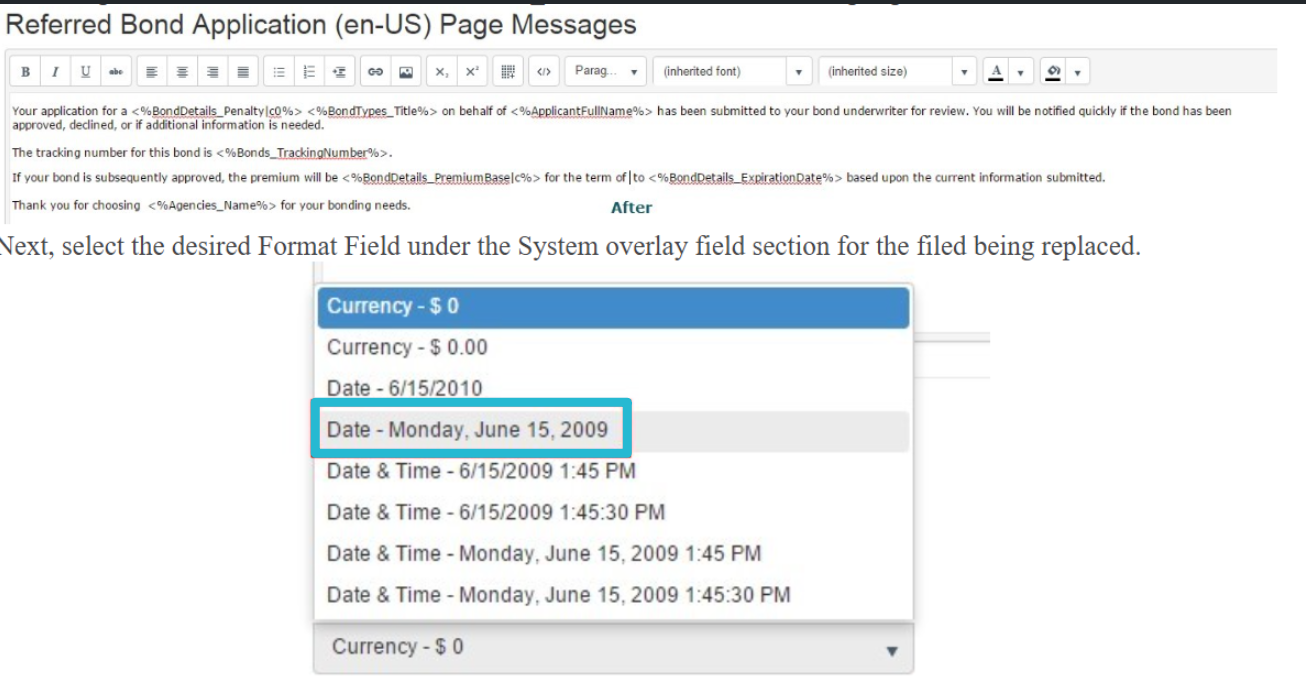
Place the cursor in the field where the formatting is needed. In this example, the Bond Effective Date is being changed so the formatting will be Date – Monday, June 9, 2009 instead of the default formatting that would be applied using the overlay <%BondDetails_EffectiveDate%>.

The default formatting needs to be erased and the cursor placed in the area of the message where the new formatting is desired. Below the <%BondDetails_EffectiveDate%> field is highlighted and then deleted.
Copy the field under the System Overlay Field section for the field being replaced and paste into the message.

The field is inserted in the Page Message with the correct configuration to allow the message to be printed with the date in the desired format.

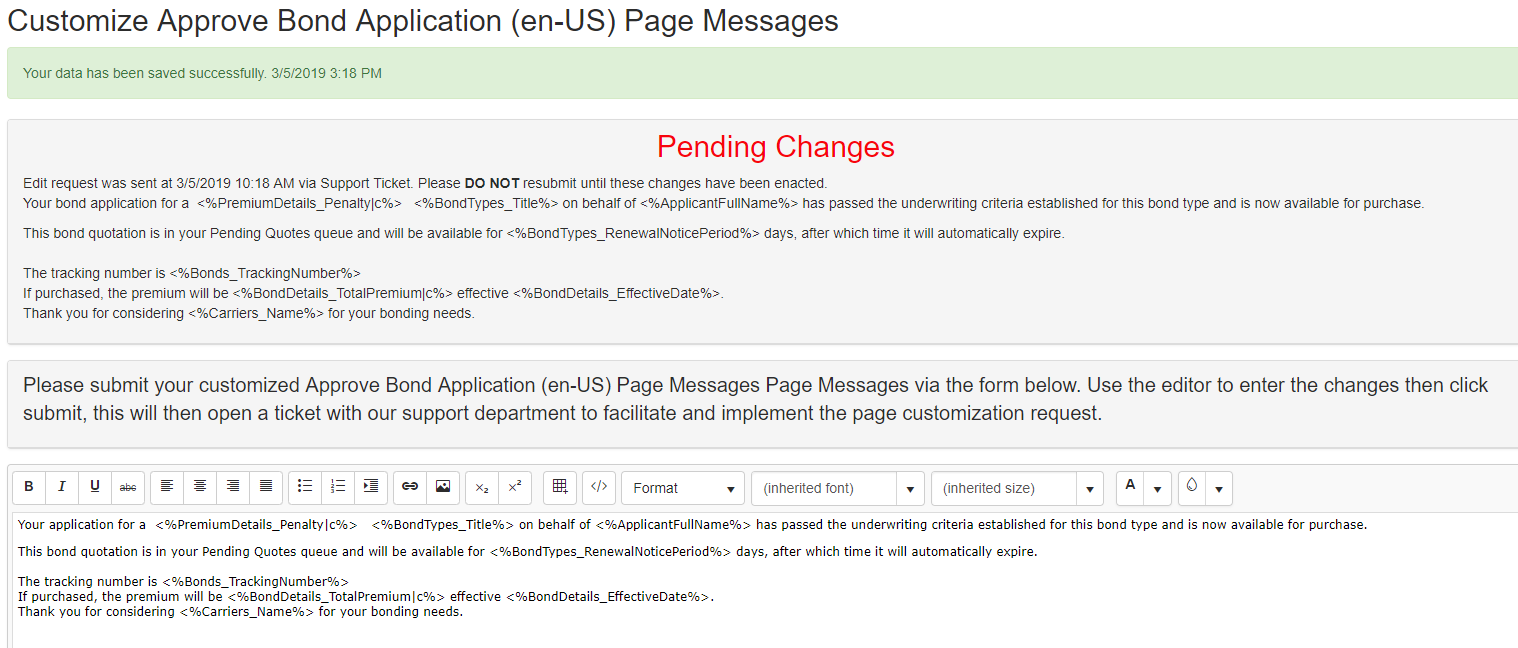
Click the Submit button and a message will be displayed that the data has been saved.
Due to security restrictions, these will not be updated immediately.
The message will be in a Pending status which will require review from the TSC support team.
Any changes to the text editor will automatically create a ticket to the TSC Knowledgebase system, prompting a review and promotion of the changes to take effect.

