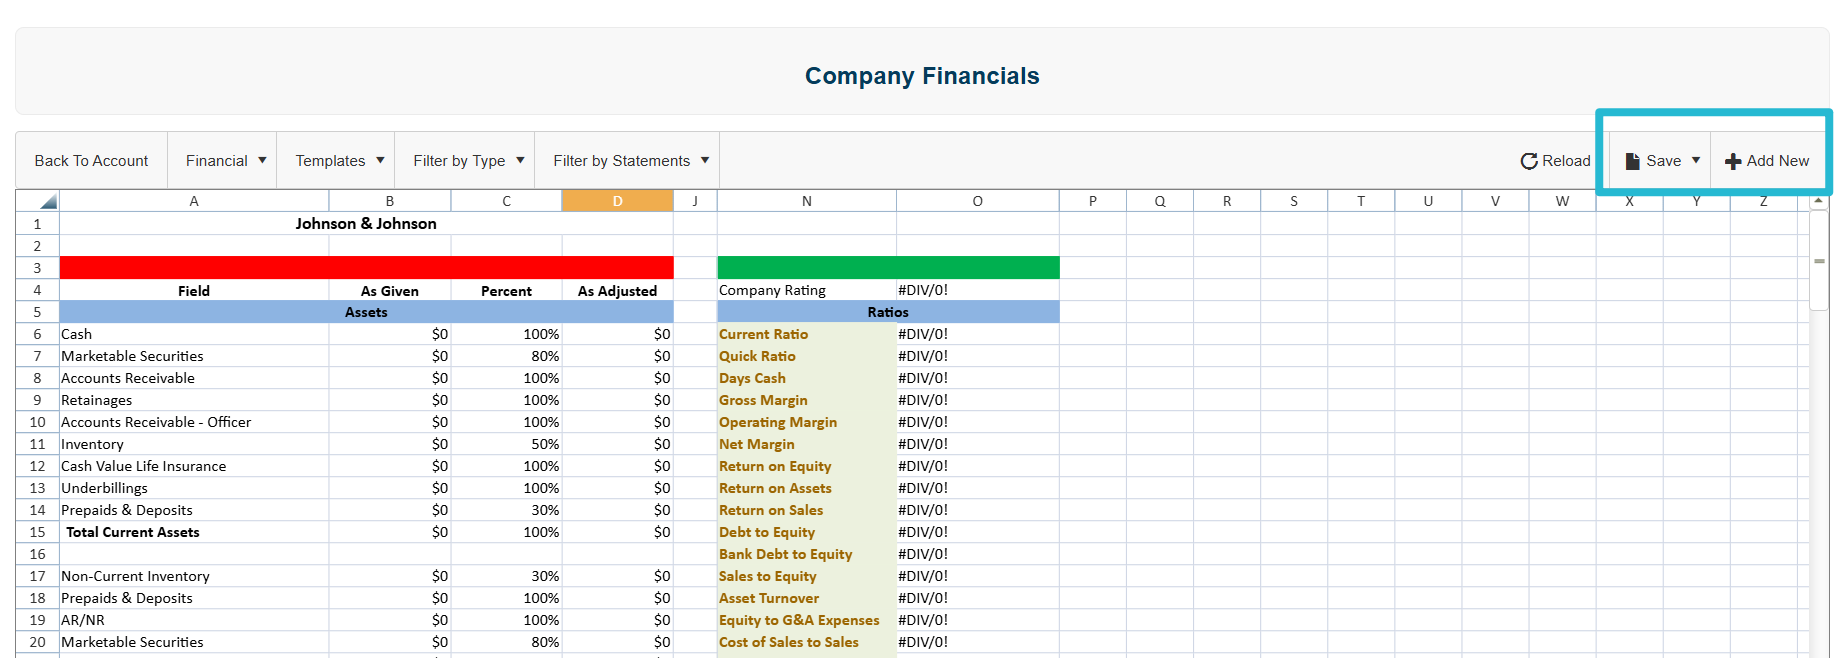
Financial Menu (Agent User)
An important feature in Tinubu Surety Solution for Carriers (TSSC) is the ability to use an Excel interface to view, update, and export different financial reports for an account.
Financial Account Information
Use the search bar at the top of the screen to locate the account.
Select the Financial dropdown menu.
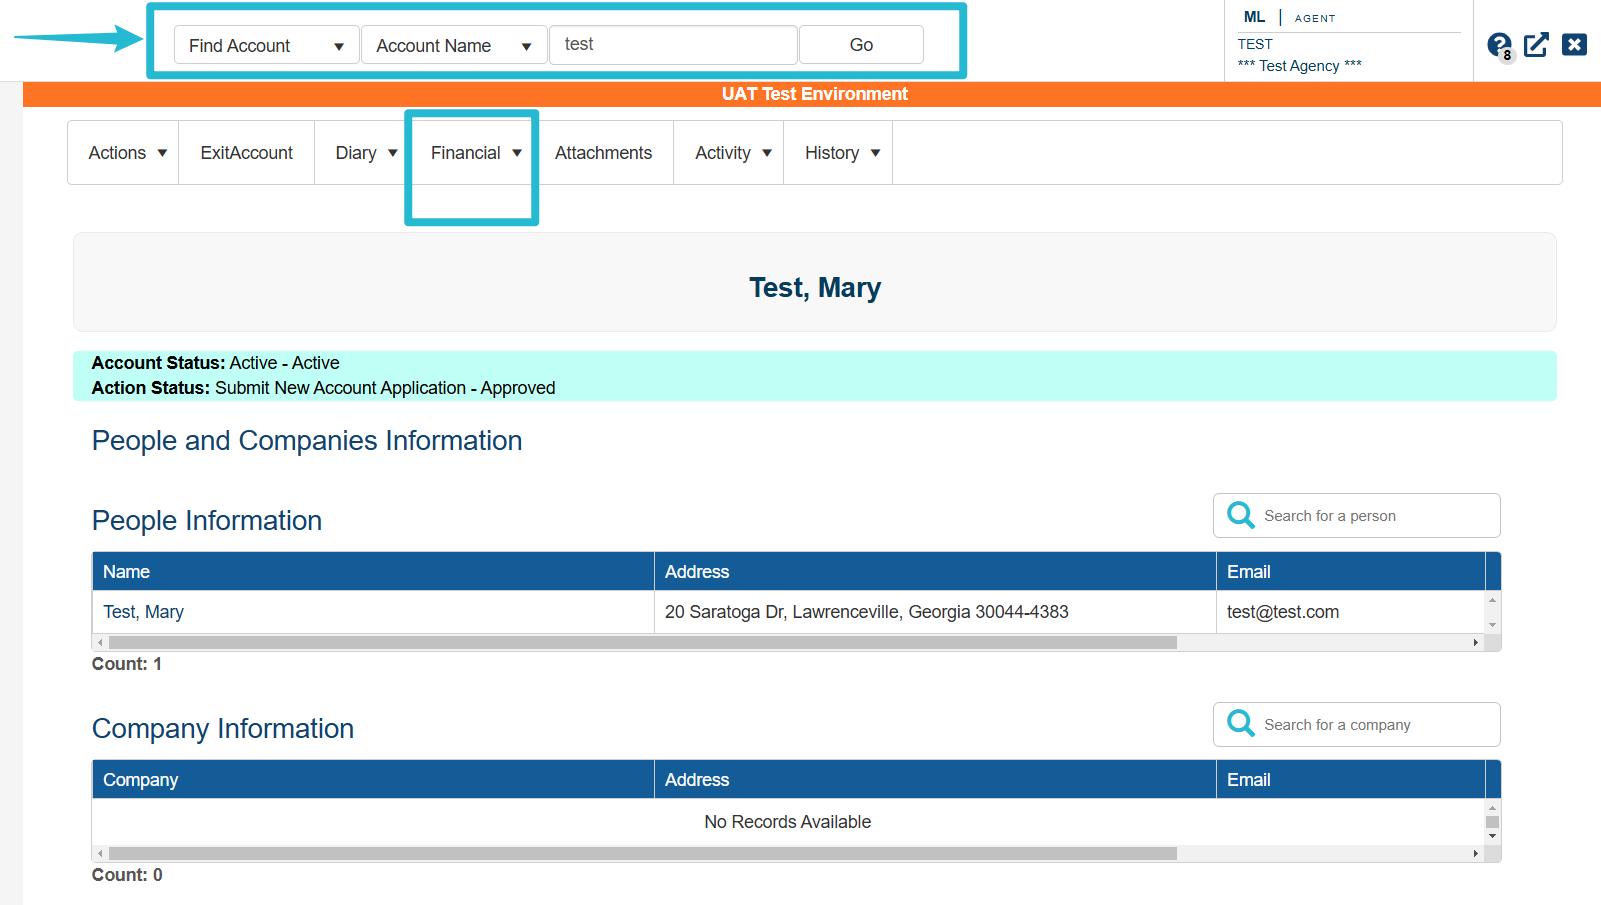
Please note the four options under Financial. They will be addressed one by one. Please refer to this screenshot for easy navigation.

Payment Profiles
Payment Profiles provide a method of storing multiple credit card and ACH profiles per account. When buying a bond with this account these profiles will be available. This article covers how to create, update, and delete payment profiles.
Select Payment Profiles from the Financial dropdown menu.
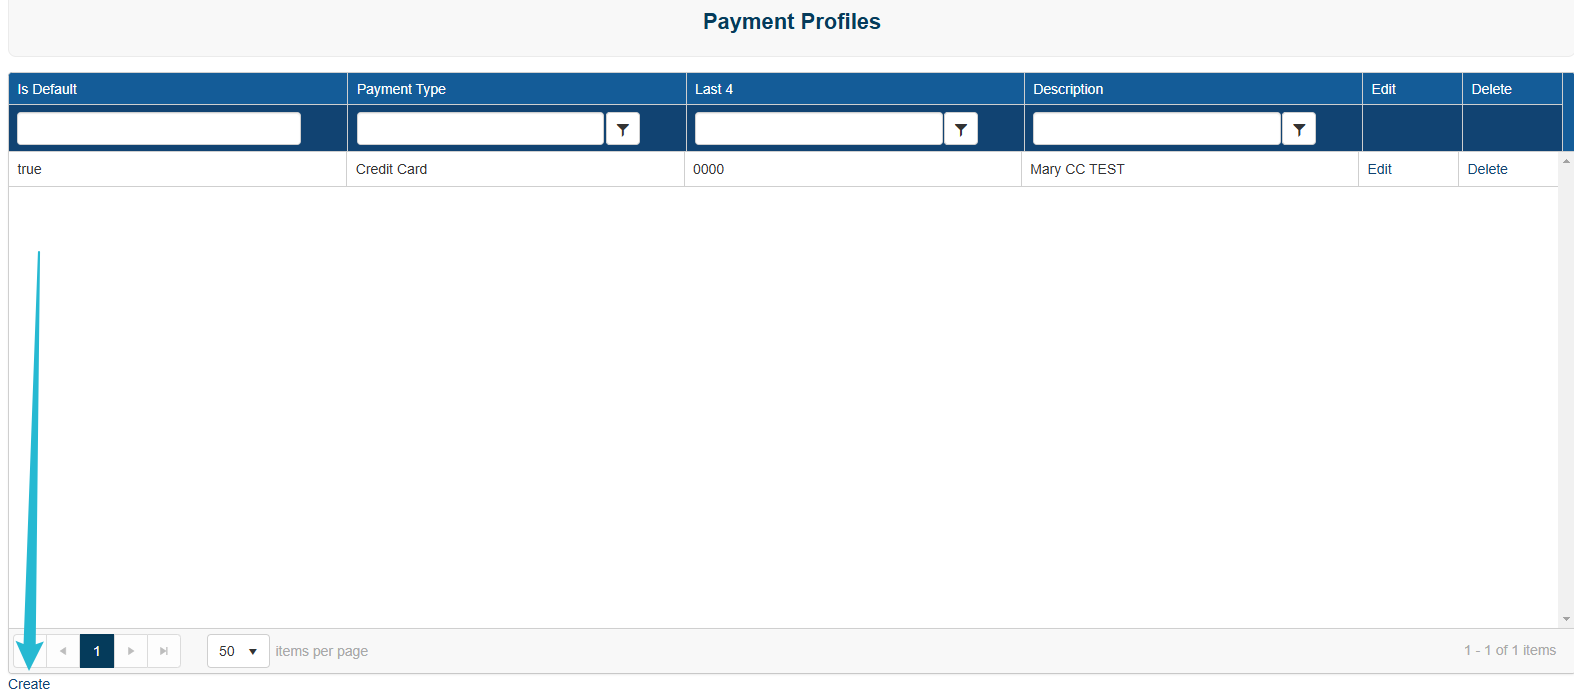
Criteria can be filtered by the options highlighted below.
You may Edit or Delete the entry by selecting Edit or Delete

Create a New Payment Profile
If the account does not have any Payment Profiles the grid will be blank. An account can still buy bonds without a payment profile. When completing the payment for the bond, the user will be prompted to enter the payment type. If credit card or ACH is selected, the user will be prompted to enter a new payment profile. The new profile will be saved to the account.
Select Create
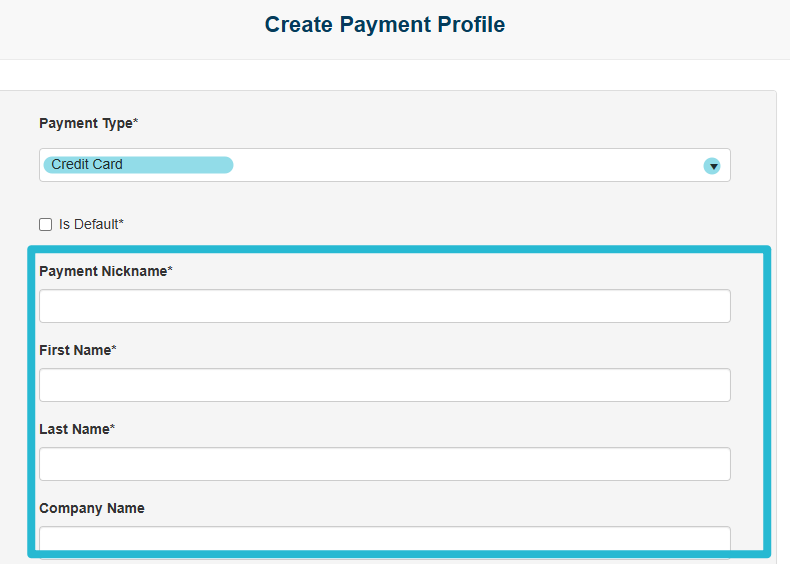
Select Credit Card or Bank ACH.
Complete the remainder of the required information and select Submit.
The new entry will be seen on the Payment Profiles screen.
Account Profile
Export the Account Profile to Excel
A Excel interface can be used to view, update, and export different financial reports for an account.
Select Account Profile from the Financial dropdown menu on the account page.
Select the Financial dropdown menu to select the information you wish to view in the spreadsheet.
Select the Save menu to Save to Server or Save to Disk.
Save to Server allows you to save a copy and retrieve it in the cloud.
Save to Disk allows you to save a copy to your computer.
Select Back to Account to return to the account details.

Work in Progress (WIP)
A WIP, or work in progress, is a ledger that accounts for the value of inventory, labor and overhead of all ongoing jobs. It is a list of partially completed jobs awaiting completion. These jobs are bonded projects, unique to the account, which have corresponding bonds in our system. Our WIP feature is intended to integrate with the system such that when a contract (final) bond is purchased, the information from the bond application (i.e., Contract Amount, Bond Number, Project Name, etc.), it is automatically added to the WIP, which is presented in excel spreadsheet format. These excel spreadsheets are typically unique to each client, with each using different data points, different layout, and different formulas/calculations. This feature allows the use of the Excel interface to view, update, and export a trend of Work in Progress information for an account.
Select Work in Progress from the Financial dropdown menu on the account page.
Current Projects will be displayed.
WIP Adding Projects
The Add New button directly on the spreadsheet or under the Add New menu on the right side of the screen allows you to add a new trend line.
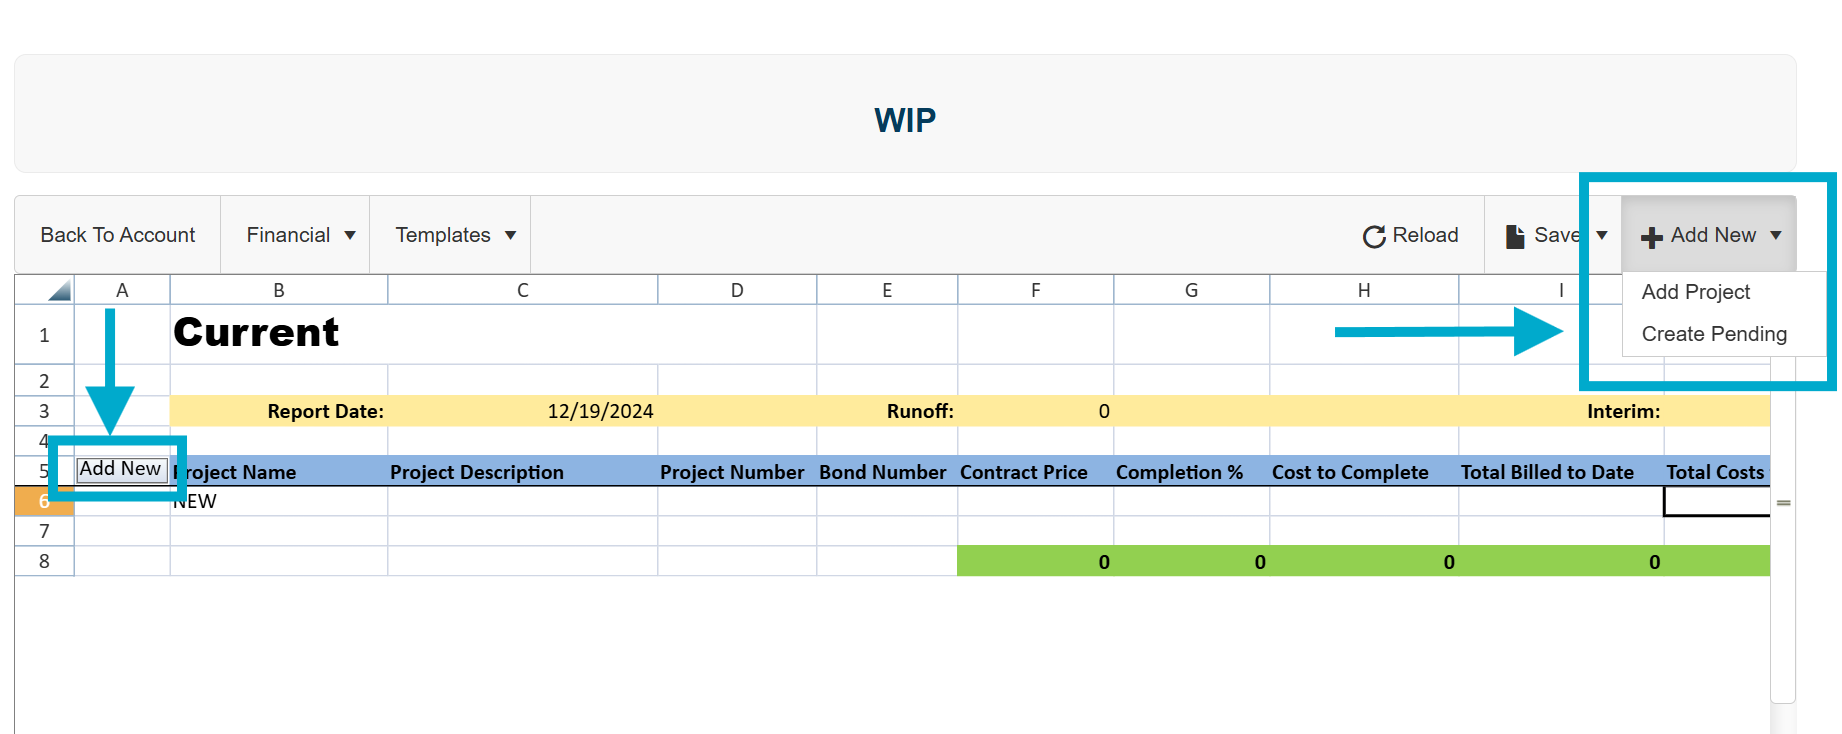
Adding New WIP Inputs to the Trend
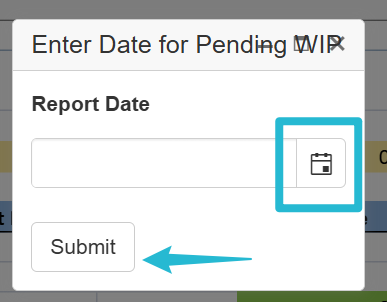
Choosing Create Pending under the Add New menu on the right, brings up a pop up window. Input the date of the next report. This is needed to notate the multiple WIP_Input reports on the Work In Progress trend.
Select Submit.
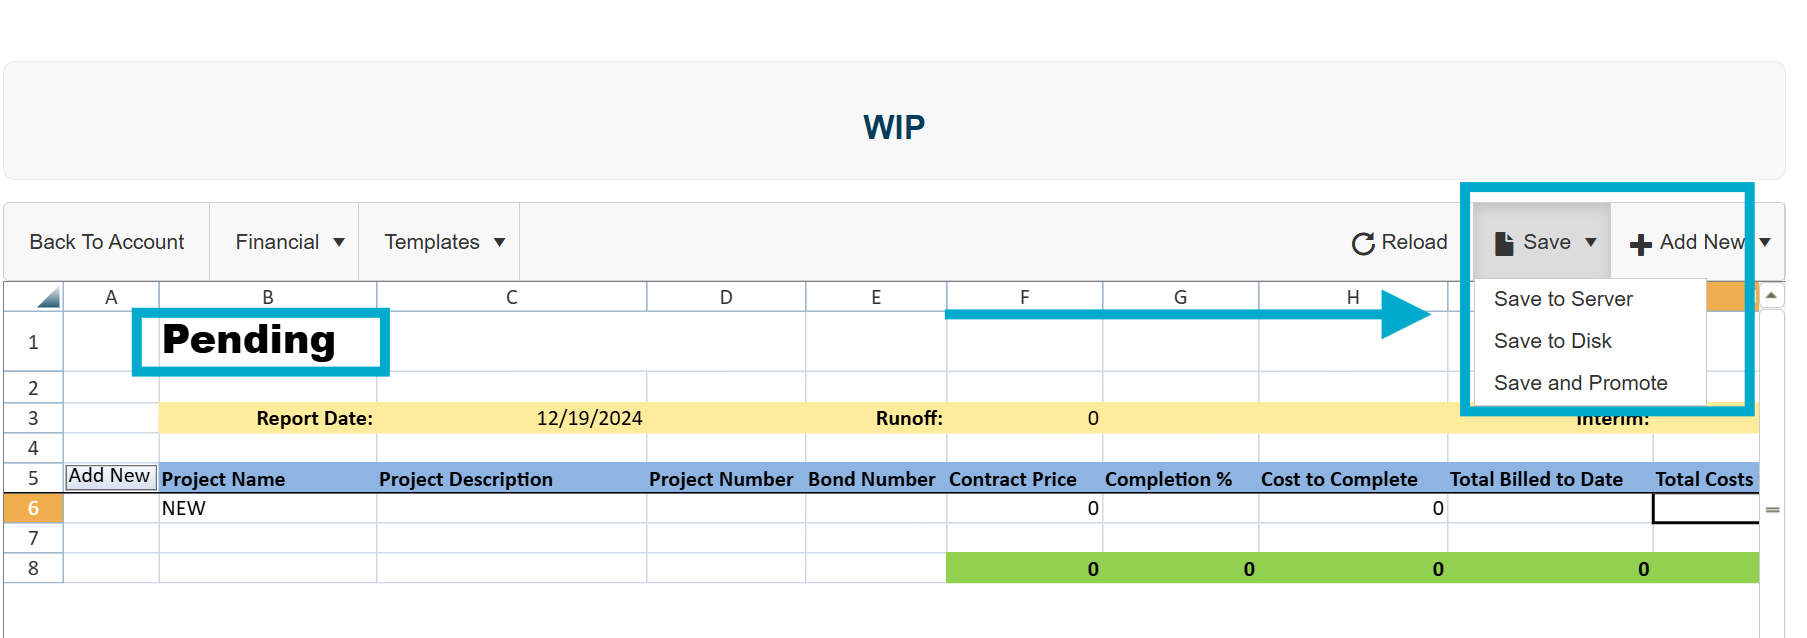
After creating the new report, it will be displayed as Pending.
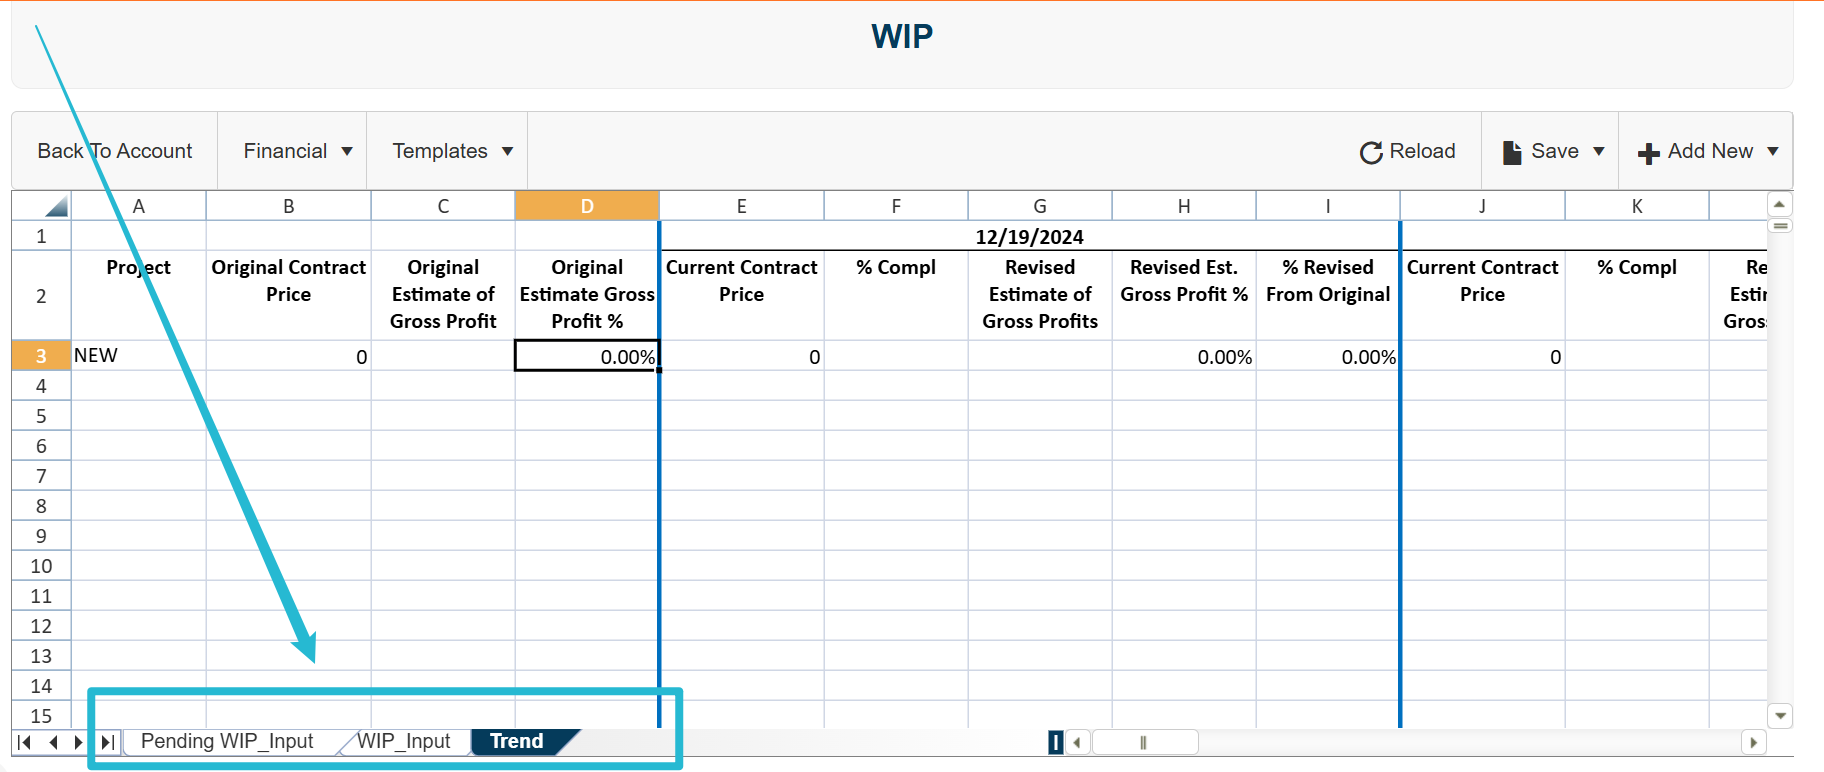
Navigate to the tabs at the bottom to view the data.
Select the Save menu to Save to Server, Save to Disk, or Save and Promote.
Save to Server allows you to save a copy and retrieve it in the cloud.
Save to Disk allows you to save a copy to your computer.
The Save And Promote will save the report and add the data to the 'Trend' tab of the Excel interface.
Select Back to Account to return to the account details.
Analyses
Reports can be created based on account specific information. Once these reports are ready they can be viewed from the Analyses section of the account Financials dropdown.
Select Analyses from the Financial dropdown menu on the account page. The following information will be displayed.
People/Company Information
Line of Authority
Account Information
Default Commission
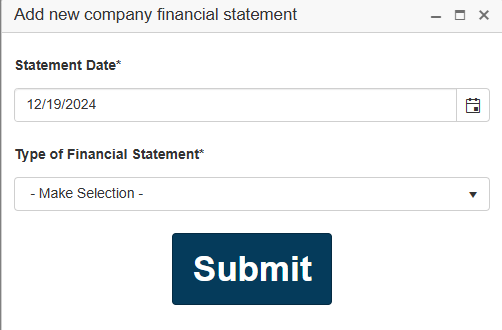
Selecting Financials on the People/Company you wish to view will allow you to produce a financial statement. Simply select the date and type in the pop up window as shown below.
Select Submit.

The Company Financials will be displayed. You may use the filters as desired.
Select the Save menu to Save to Server, Save to Disk, or Save and Promote.
Save to Server allows you to save a copy and retrieve it in the cloud.
Save to Disk allows you to save a copy to your computer.
