Buy a Bond Commercial (Agent user)
Navigating to Buy a Bond
Select Buy a Bond from the main landing page.

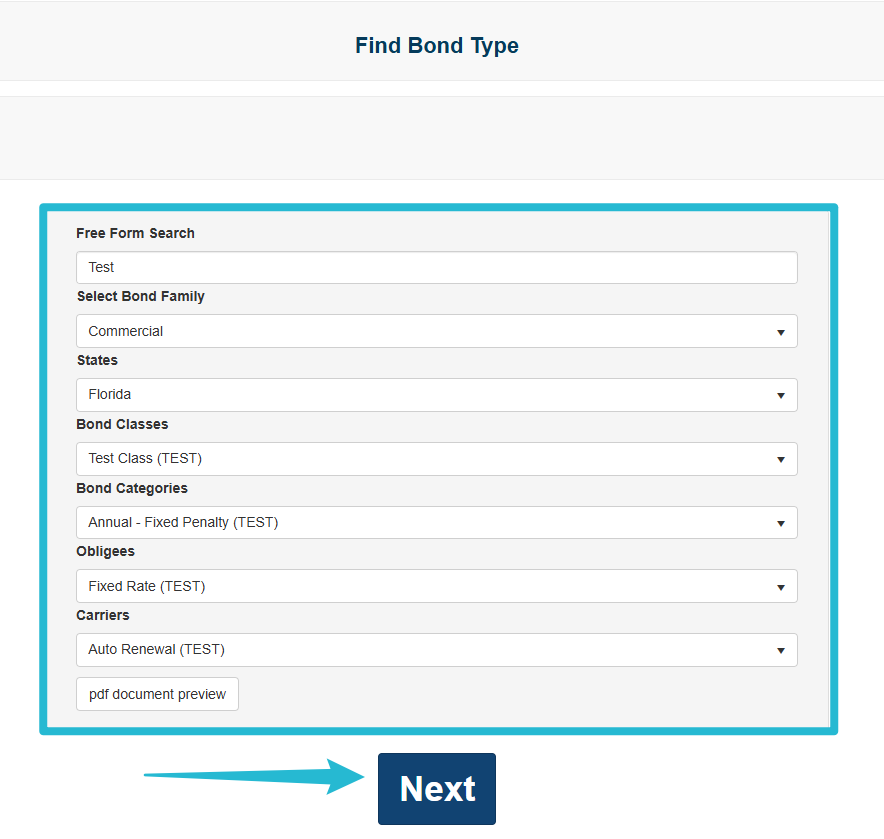
Complete the information.
Grayed areas will allow entry as selections are made.
You may view the data entries as a PDF by selecting pdf document preview.
Select Next
Find Bond Type
Adding the Initial Bond Information
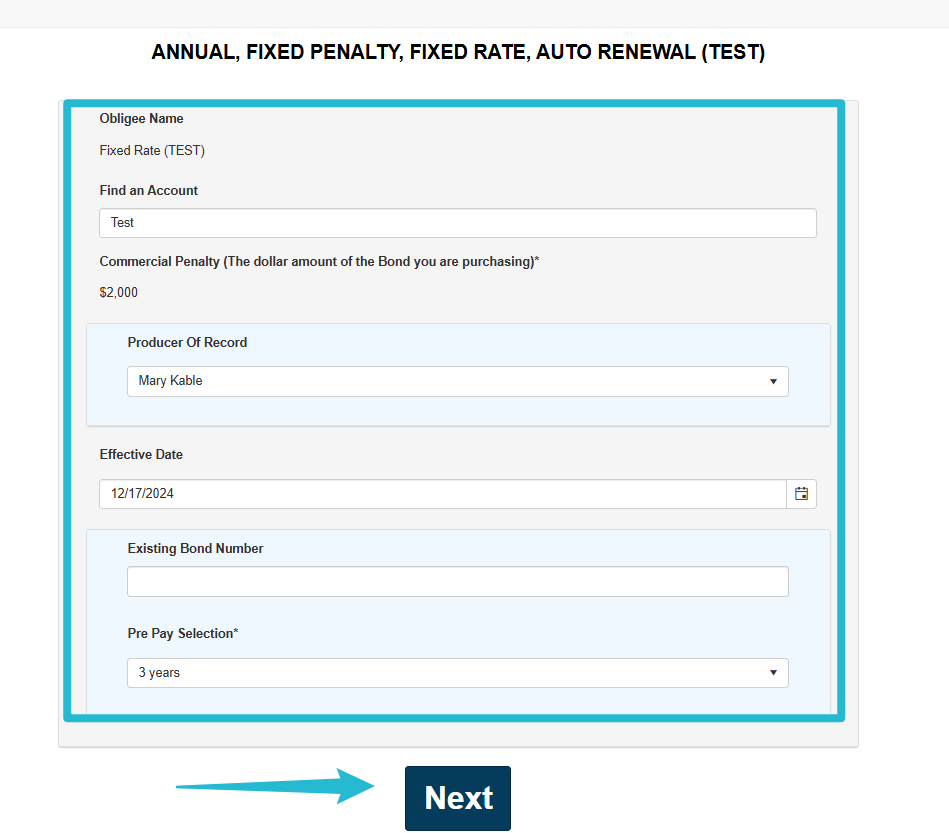
Add the Initial Bond Information.
Select Next
Adding the Bond Applicant
You may search for a current person/company or add a new one.
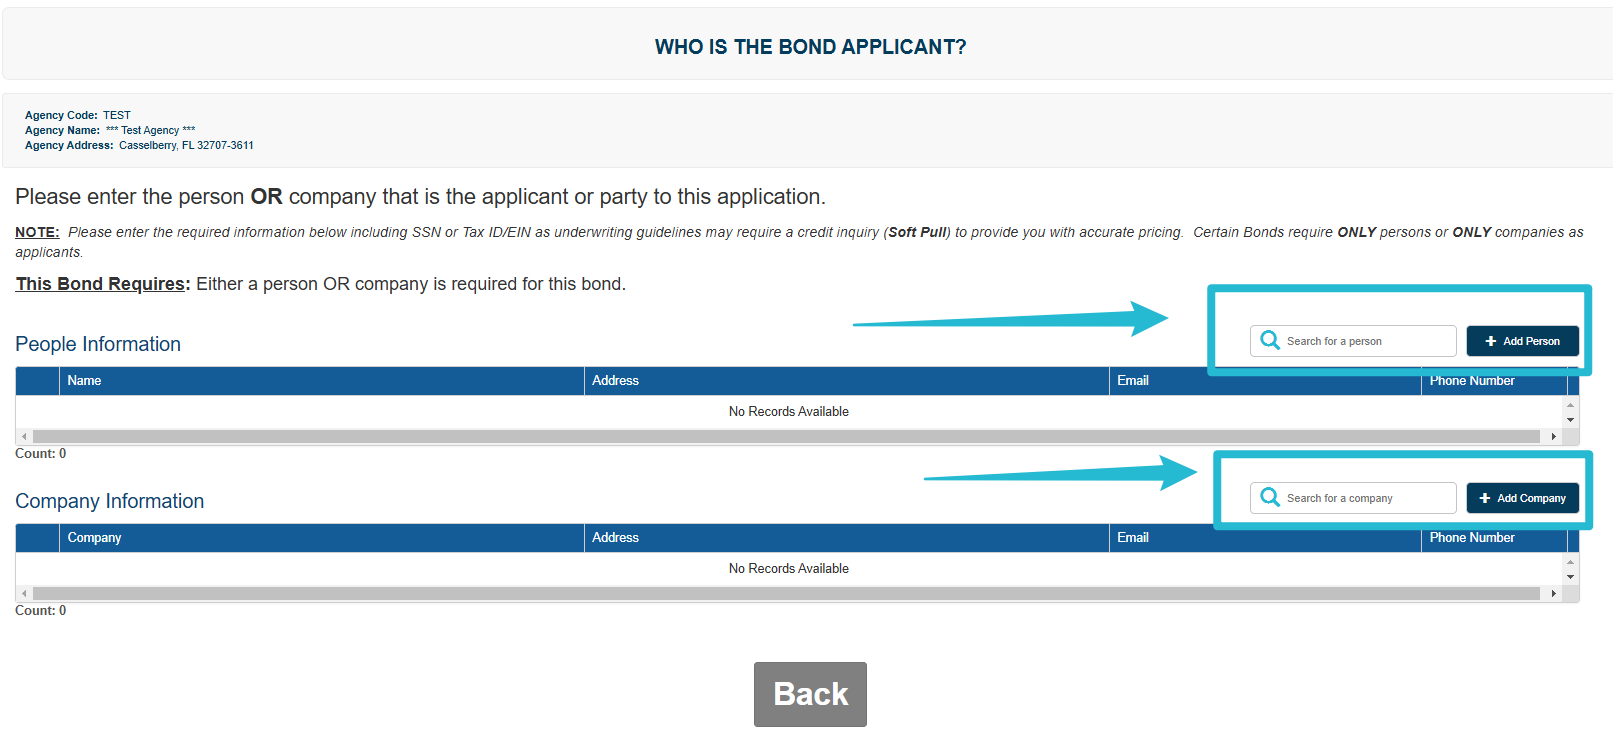
If you want to add a new entry, select Add Person or Add Company.
For this example, I will Add a Person
The system will automatically check for possible duplicate entries and offer suggestions.
In the example below, the system found duplicate entries for the email address.
Complete the information for the new person, or select one of the above options.
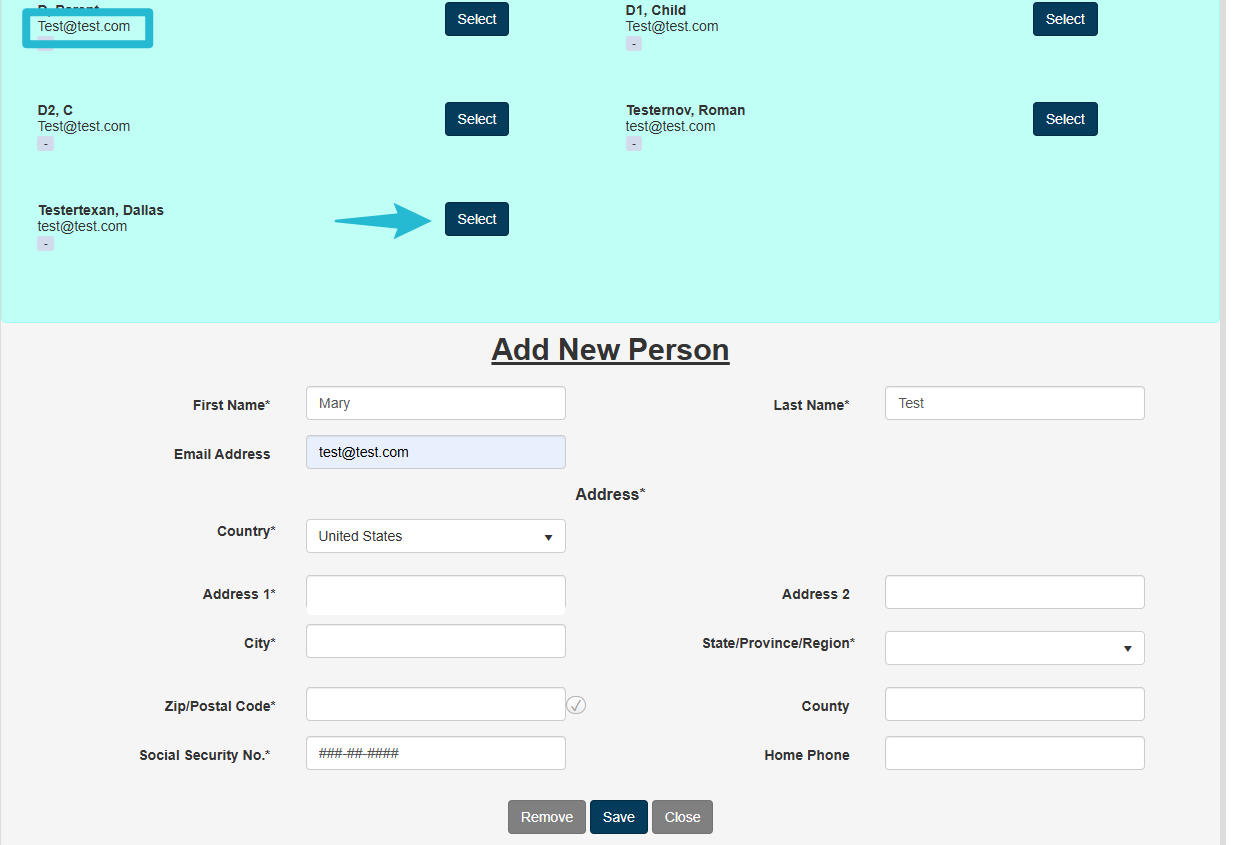
Address verification is enabled.
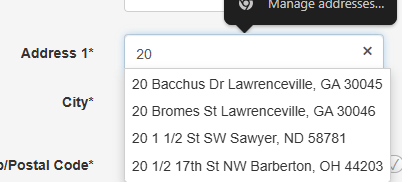
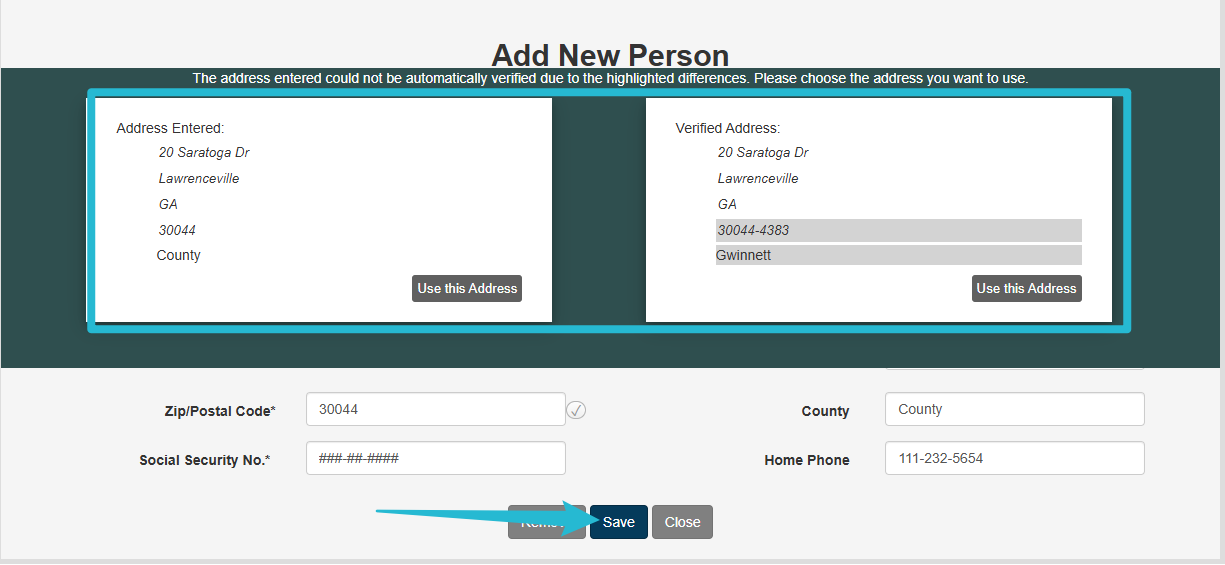
Once you select Save, you will have the option to verify the address.
Select the preferred address.
Select Save.
The system autosaves your entry. If you do not wish to retain the record, you must select Remove.
Confirm the selection is correct under Choose who will be named on the bond (Applicant)*.
Select Next

Bond details will be displayed
Select Submit if you are satisfied with your entries.
If you need to change any information, select Back.

Application Status
The bond details will be displayed.
If there is an issue with a bond or it needs approval, Pending will be displayed.
You must select I Agree under the Electronic Signature to continue.
Select Go To Bond at anytime to view the details.
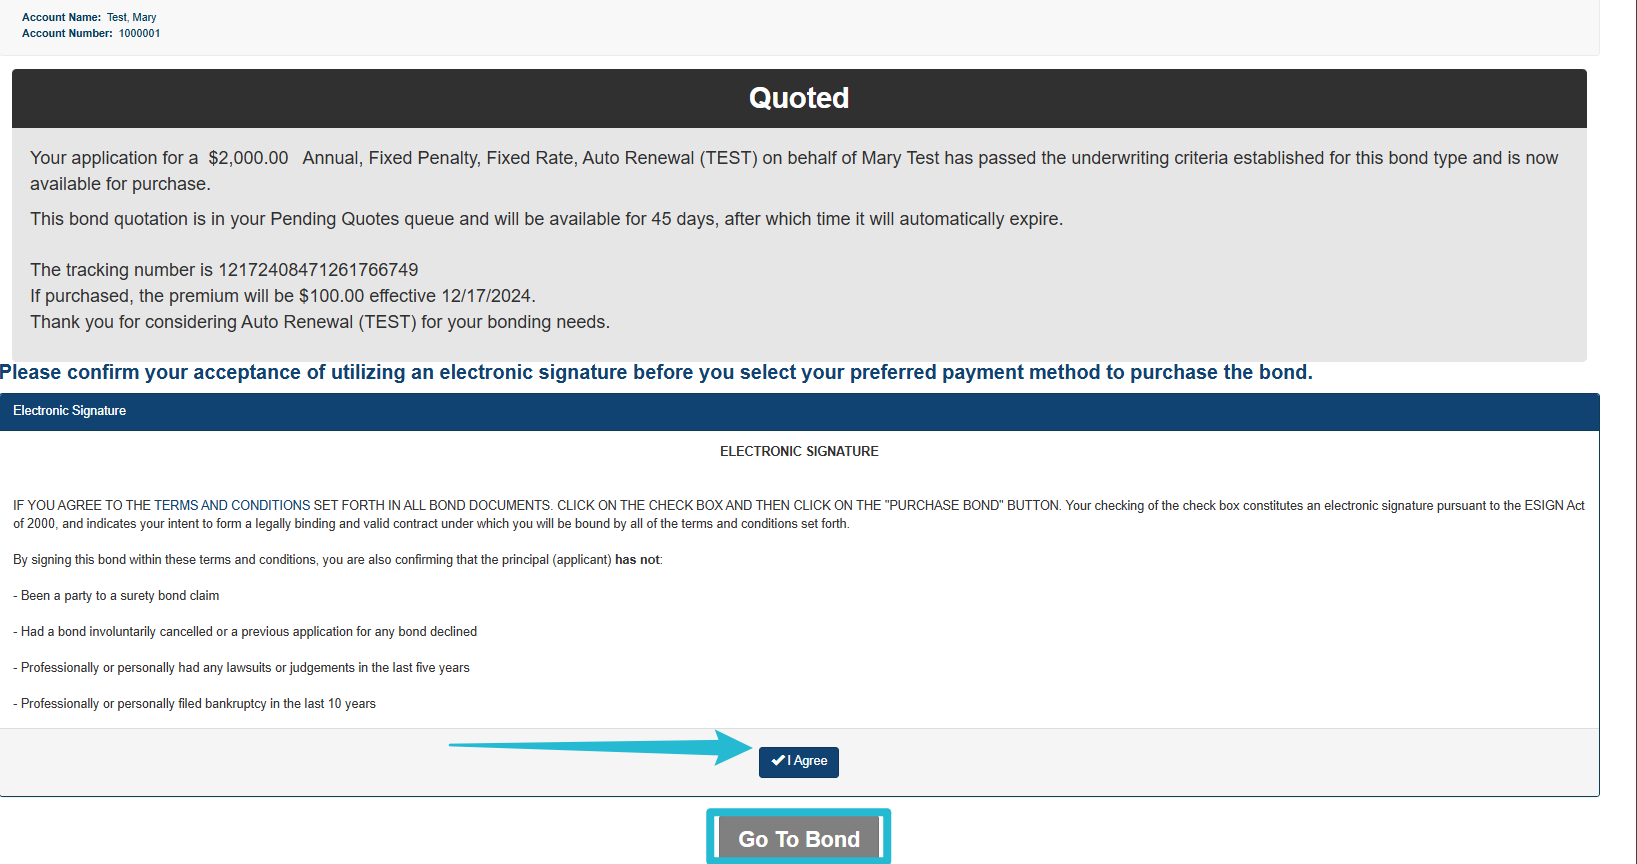
You may change your Electronic Signature status by selecting the +.


Select the Billing Type from the dropdown menu to continue.
Select Purchase Bond.

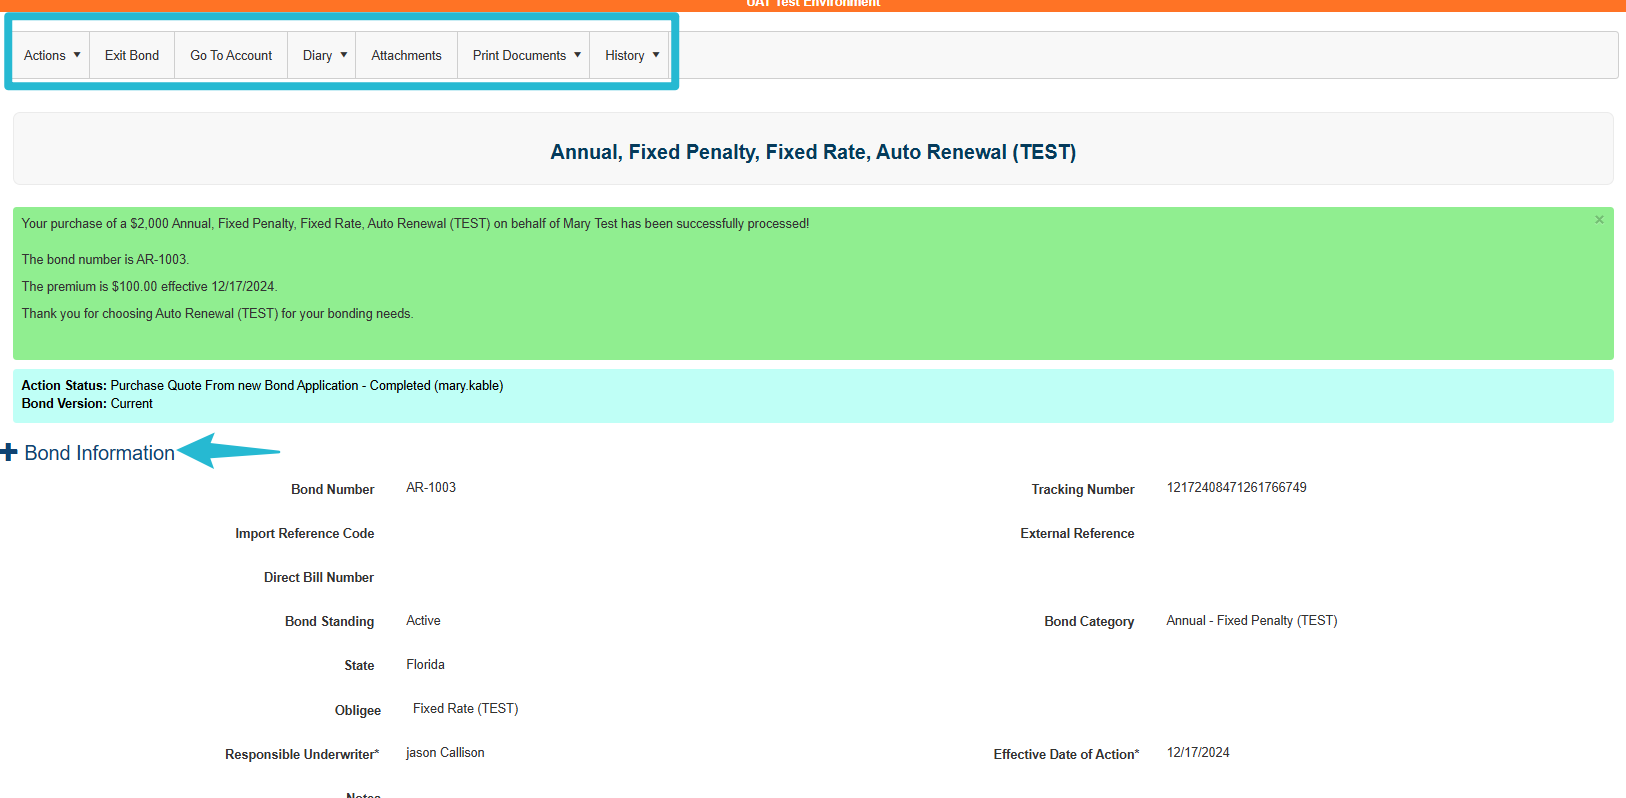
Purchased Bond Details
The bond purchase information will be displayed.
The menu at the top will allow you to view more details regarding the bond as well as add notes and attachments.
