Branches
Overview of Branches
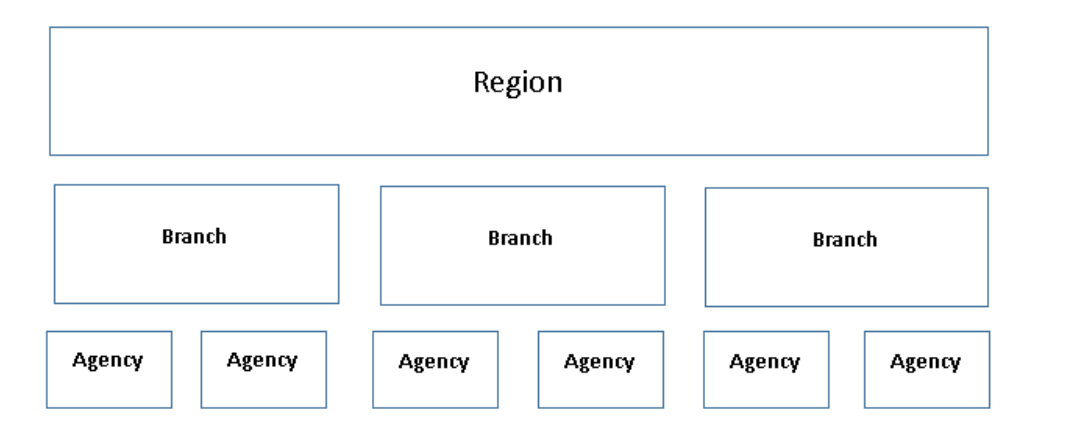
Tinubu Surety Solution for Carriers (TSC) organizes agencies into branches, and then branches into regions. Branches represent the intermediate level of the hierarchy. See the graphic below for a visual.
Users can be branch restricted which will limit their access to bonds and accounts that are underneath the branches that are assigned to them. Users that are not branch restricted can access bonds and accounts beyond the branches that are assigned to them.

Add a Branch
Select System Tables/Branches and click the Add Items button.
A new record will be inserted at the top of the Active Branches List.
Enter a Name, Code, Region, and Branch Representative for this branch.
The Code is used for reporting and is a unique identifier for each branch.
Every branch is assigned to a previously set up in Regions .
The Branch Representative includes users within the branch, as well as users that are not branch restricted.
The user designated as the Branch Representative will be the default responsible underwriter for bond applications submitted by Agent or Consumer type users, since these users cannot select the responsible underwriter.
Click the Save Changes button or click Cancel to remove changes.
You will be prompted to confirm or cancel your actions.
Cancel will return the use to the unsaved entry.

Edit a Branch
Edit an existing Branch’s fields by clicking into the field of the entry and make the desired changes.
Click the Save Changes button or click Cancel to remove changes.
You will be prompted to confirm or cancel your actions.
Cancel will return the use to the unsaved entry.
Inactivate a Branch
Select System Tables/Branches.
Click the Inactivate link for the branch that needs to be inactivated.
This will not delete it permanently, but it will not be available for use until it is reactivated.
You will be prompted to confirm or cancel your actions.
Recover an Inactivated Branch
Select System Tables/Branches.
Click the Recover Inactive Records link at the bottom of the screen.
Click Reactivate for the Branches needed to be reactivated.
You will be prompted to confirm or cancel your actions.
Select the Back to Active Items link at the bottom of the screen.

Assigning States to a Branch
Assigning a State does not drive functionality.
Assigning a state can be helpful for reporting and informational purposes.
Click the Branch States link from the Active Branches screen.

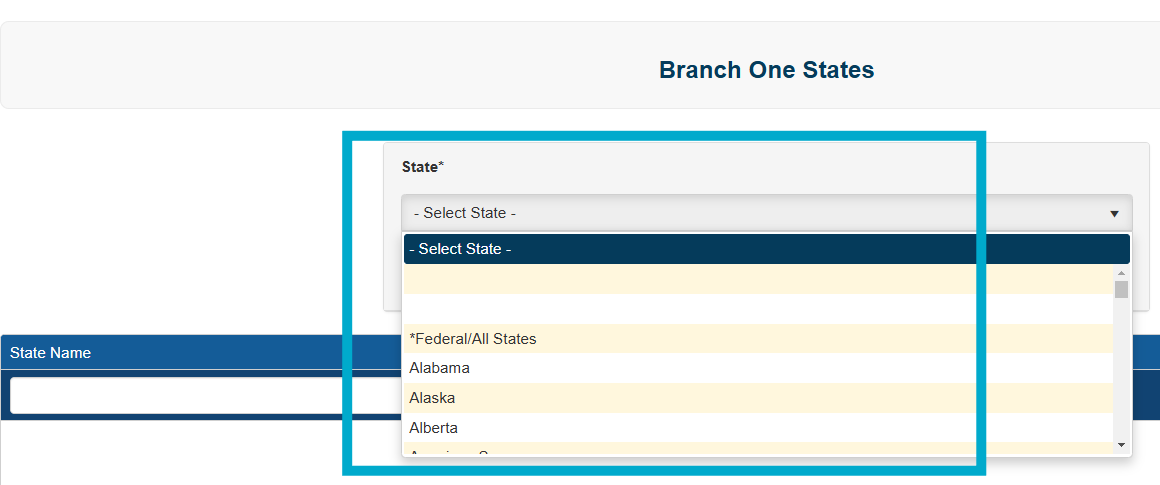
Use the drop down to select the state and select Add State.
Select Back to List at the bottom of the screen to return to the Active Branches list.

Removing Assigned States from a Branch
Select the Remove link for the state you wish to remove.
This will delete the record permanently and it will not be available to be reactivated.
You will be prompted to confirm or cancel your action.

